A Year at War
The Distance Between Us
Witness to a civilian casualty
Subdivision becomes ghost town
Teammates & Brothers
iPhone, the right tool?
http://lens.blogs.nytimes.com/2010/11/21/finding-the-right-tool-to-tell-a-war-story/?ref=asia
ASSIGNMENT #08 CITY OR TOWN (PART 2)
(Due 3/28/11) Photo essay on a selected place
Part 2 of 3-week assignment
PART I
READING:
History of Photojournalism; ( see photographers bios or the Blog)
1. MAGNUM
2. ROBERT CAPA
PART II
SHOOTING ASSIGNMENT
Continue shooting the interesting town, place, or neighborhood, in the manner of a National Geographic photo essay, see the "Places of a Lifetime." Go to same location, but at a different time of day/night, as this is a multiple-week assignment. Explore the place, further and produce a diverse set of images.
Shoot photos at various times of the day and night. Use all the techniques and strategies we've discussed in class. Focus on the people, not just the places.
use your flash if necessary.
*FOR NEXT WEEK, students must submit:
1. Select (10-15) ADDITIONAL best photos.
2. Caption photos.
3. SLUG PHOTO AS FOLLOWS:
Last name_townname_01.jpg, Last name_townname_02.jpg
EXAMPLE: franklin_ hoboken.jpg
4. Place images in the “drop folder.”
PART III
Select a piece of music, original or not, and bring to class in MP3 format. WAVE files are OK also. Select and appropriate piece that goes well with you subject.


ASSIGNMENT #08 CITY OR TOWN
(Due 3/21/11) -Photo essay on a selected place
PART 1.
READING:
History of Photojournalism; (see photographers bios or the Blog)
1. FSA
2. WEEGEE
3. LIFE MAGAZINE
PART 2
Log onto the National; Geographic website; "Places of a Lifetime."
Study some of the photo essays.
http://travel.nationalgeographic.com/places/places-of-a-lifetime.html
List of (3) subject ideas for Final Project.
-Submit Word document, with brief description.
Select an interesting town, place, or neighborhood, and shoot a photo essay in the manner of a National Geographic photo essay, see the "places of a lifetime."
Be sure you select a location you can go back to the next (3) weeks, as this is a multiple-week assignment. Be sure you select a location that is visual and interesting. Explore the place, and produce a diverse set of images.
Research the town, learn what the town is known for, shoot photos relative to the town. Shoot photos at various times of the day and night. Use all the techniques and strategies we've discussed in class. Focus on the people, not just the places.
use your flash if necessary.
*FOR NEXT WEEK, students must submit:
1. Select (10-15) best photos.
2. Caption photos.
3. SLUG PHOTO AS FOLLOWS:
Last name_townname_01.jpg, Last name_townname_02.jpg
EXAMPLE: franklin_ hoboken.jpg
4. Place images in the “drop folder.”
FINAL PROJECT
Photo essay Soundslide (DUE 5/9/11) -no exceptions.
25pts
I. FINAL PROJECT
The Final Project is a 8-week project that requires each student to spend significant time with a chosen subject, to produce a well-crafted, in-depth photo essay in the form of a Soundslide. The Final Project is in lieu of a Final Exam, and should be treated as such.
The subject of this project should be a person who is interesting.
Each student must find and select a person who is multidimensional and lives life with a purpose and in a way that is interesting to others.
II. GRADING
Each final project will be graded as follows:
1. (3pts) SUBJECT SELECTION & WRITTEN PROPOSAL
2. (7pts) WEEKLY PROGRESSION
Work should be completed as follows:
3. (3pts) AUDIO
4. (5pts) PHOTOGRAPHY
5. (7pts) FINISHED PRODUCT
III. WHAT’S DUE
¨You will not receive credit for any projects that do not play.

ASSIGNMENT #07 FLASH USE/ALBUM COVER
(Due 3/7/11)
Flash Usage (2 parts) Rock Star
PART 1.
READING:
National Geographic Ultimate Field Guide
Read pages 25, 95-103, 103-117
Guide to Photojournalism
By Brian Horton
Read pages 79-101“Features and Portraits; Seeing the World Around Us.”
Visual Journalism
By Christopher R. Harris & Paul Martin Lester
Read pages 63-86“Technical Considerations.”
PART 2
History of Photojournalism;
FSA (see photographers bios or the Blog)
PART 3
SHOOTING ASSIGNMENT (2) PARTS
Find a musician(s) to photograph, or an actor(s) to play a musician, and make an album/CD cover shots USING YOUR FLASH both indoors and outdoors. Also, add album title/artist text using Adobe photoshop. Plan your text placement before composing your images. Save image as Photoshop document
PART A
Photograph your musician indoors using a camera flash.
Be creative, and make personality driven images, highlighted by excellent lighting. Make well-composed and expressive photos of a person using your flash. Must be taken indoors.
***You will be graded on your creativity and use of flash.***
-Flash use should be executed perfectly.
-Set proper white balance setting be sure to have correct white balance usage.
-Use bounce flash whenever possible.
-AVOID: red eye, shadows behind heads, and other forms of sloppy flash use.
Keep in mind some of the elements of good composition, avoiding; cluttered and distracting backgrounds, objects appearing behind heads, dead space, etc. Fill the frame, making interesting, personality-filled photos, that have impact.
Composition, positioning, background, lighting, and lens selection should all be taken into consideration.
-consider the various flash techniques, such as: bounce flash, fill-flash, diffused flash.
PART B
Photograph your musician outdoors using a camera flash. This should be a different set-up than the indoor images.
Can be taken during daytime, night-time, or twilight.
Be creative, and make personality driven images. Make well-composed and expressive photos of a person using your flash. Must be taken indoors.
***You will be graded on your creativity and use of flash.***
-Flash use should be executed perfectly.
-Set proper white balance setting, be sure to have correct white balance usage.
-Use bounce flash whenever possible.
-AVOID: red eye, shadows behind heads, and other forms of sloppy flash use.
Keep in mind some of the elements of good composition, avoiding; cluttered and distracting backgrounds, objects appearing behind heads, dead space, etc. Fill the frame, making interesting, personality-filled photos, that have impact.
Composition, positioning, background, lighting, and lens selection should all be taken into consideration.
-consider the various flash techniques, such as: bounce flash, fill-flash, diffused flash.
*Study methods discussed in class and in reading material.
*Students must complete:
1. Select (1) best photo for each part.
2. Add text: album title and artist name
3. Save image as Photoshop document, NOT JPG.
4. SLUG PHOTO AS FOLLOWS:
Last name_flash.jpg
EXAMPLE: franklin_ flash01.psd
franklin_ flash02.psd
5. Place images in the “drop folder.”
EXTRA WEEK TO COMPLETE!
ASSIGNMENT #06
(Due Monday 3/14/11 (three-weeks)
Live Event (Multiple Pictures)
PART 1
READING:
Guide to Photojournalism
By Brian Horton
Read pages 54-77
“News: Sensitivity, Thinking, Instinct and Curiosity”
Read pages 131-152
“Lessons; Horst Faas, J.Pat Carter, Alan Diaz”
PART 2
HISTORY OF PHOTOJOURNALISM
Please read the following DOC’s:
PART 3
Come up with a short list of subjects for consideration for your final project. Be ready to discuss in class.
PART 4
Cover a Live Event / Multiple Pictures
Select a scheduled public event and photograph all aspects of the event in the form of a photo essay. Be sure to shoot various scenes, including overalls and details, and illustrate what the event is about. Get photos of all the important people and subject matter.
Select a carefully chosen event to shoot, thus you have two weeks to plan.
Suggestions; news event, parade, protest, performance, etc.
Do not shoot a sporting event, a press conference, fair, etc. Check newspaper, campus fliers, and magazine listings for a schedule of events in your area.
Select an event that will be visual, not something static like someone standing at a podium talking. Think of some of the work reviewed in class. Your event selection is key, give it some thought and planning.
Be prepared to use your flash if necessary. Keep in mind some of the elements of good composition, avoiding; cluttered and distracting backgrounds, objects appearing behind heads, dead space, etc. Fill the frame, making interesting photographs that have impact. Composition, positioning, background, and lens selection should all be taken into consideration. Photos as a collection should illustrate what the event is about. Make the photos relevant, avoid repetition.
Last name_live event1.jpg Last name_ live event2.jpg
EXAMPLE: franklin_ live event1.jpg
franklin_ live event2.jpg


(Due 2/28/11) Light
PART 1
History of Photojournalism; Jacob Riis & Lewis Hine
PART 2
READING:
National Geographic Field Guide
Read pages 103-117
Guide to Photojournalism
By Brian Horton
Read pages 79-101“Features and Portraits; Seeing the World Around Us.”
Visual Journalism
By Christopher R. Harris & Paul Martin Lester
Read pages 63-86“Technical Considerations.”
PART 3Light
Lighting MUST be the key element in these photos.
DO NOT USE A FLASH!
Photo 1: A documentary photo of some aspect of college life with strong sense of ARTIFICIAL light:
1. Make well-composed and expressive photo using one of the lighting techniques discussed in class. Photo should have exceptionally strong quality of light.
2. Lighting technique should be very obvious.
3. This must be a documentary-style photo, do not manipulate the image in Photoshop.
4. Do NOT USE A CAMERA FLASH!!!!!!!!!
5. Lighting must be from an artificial light, such as a lamp or bulb. Can be indoors or outdoors, day or night.
6. Keep in mind some of the elements of good composition, avoiding; cluttered and distracting backgrounds, objects appearing behind heads, dead space, etc. Fill the frame, making interesting photos that have impact.
7. Composition, perspective, background, and lens selection should all be taken into consideration. Consider the various lighting techniques discussed in class; directional light, soft light, window light, back light, etc.
Photo 2: A documentary photo of some aspect of college life with strong sense of NATURAL light:
1. Make well-composed and expressive photo using one of the lighting techniques discussed in class. Photo should have exceptionally strong quality of light.
2. Lighting technique should be very obvious.
3. This must be a documentary-style photo, do not manipulate the image in Photoshop.
4. Do NOT USE A CAMERA FLASH!!!!!!!!!
5. Lighting must be natural; sun, or cloudy day. Can be indoors or outdoors.
6. Keep in mind some of the elements of good composition, avoiding; cluttered and distracting backgrounds, objects appearing behind heads, dead space, etc. Fill the frame, making interesting photos that have impact.
7. Composition, perspective, background, and lens selection should all be taken into consideration. Consider the various lighting techniques discussed in class; directional light, soft light, window light, back light, etc.
Review examples showed in class and Power Point Presentation.
*Students must complete:
1. Select best photo from each part, submit (2) photos.
2. SLUG PHOTO AS FOLLOWS:
Last name_natural.jpg
Last name_artificial.jpg
EXAMPLE:
franklin_natural.jpg
franklin_artificial.jpg
3. Be sure to caption photos.
4. Submit to drop folder
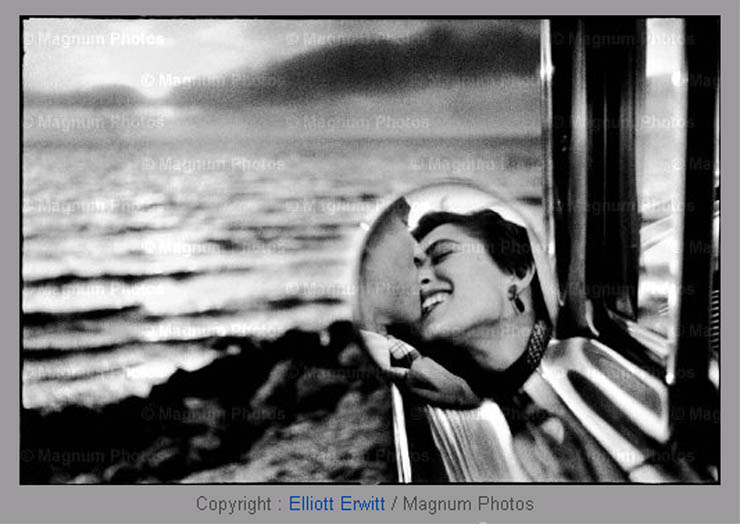 photo by Elliott Erwitt


(Due 2/21/11)
Composition
READING:
National Geographic Ultimate Field Guide
Read pages 82-95, 160-165
Guide to Photojournalism
By Brian Horton
Read pages 79-101“Features and Portraits; Seeing the World Around Us.”
PART 2
HISTORY OF PHOTOJOURNALISM
(1) Mathew Brady (see Photographer’s Bio’s)
PART 3
Composition (2) photos
PHOTO 1:
Make an environmental portrait of a person using “Rule of Thirds.
Subject: Make well-composed, expressive environmental portraits of a person in their place of work environment. Photo should give insight into what the person does. The environment should be obvious and explanatory. Make photos of subject in different positions, locations, with special emphasis on positioning.
Keep in mind:
YOU ARE IN CONTROL, this is a passive assignment.
There should be obvious foreground & background.
PHOTO 2:
Make well-composed action photos of a person at work in their place of work environment using one of these compositional techniques: Framing, Leading Lines, Juxtaposition, or Silhouette.
This should be a Graphic Photograph. One that is visual and emphasizes the relationship between the lines, shapes and forms produces an aesthetically pleasing visual presentation.
Graphic elements are as important as the story-telling content with this assignment.
Keep in mind:
This is NOT a passive assignment, this is an active photo, and should be documentary.
*Students must complete:
1. Select (1) best photo of each. (2) total.
2. Follow “Basic Photoshop”, use outline provided if needed.
3. Type complete caption in FILE INFO field in Photoshop, see instructions.
****CAPTION MUST STATE WHICH TECHNIQUE YOU ARE USING!
4.SLUG PHOTO AS FOLLOWS:
Last name_ composition1.jpg, Last name_ composition2.jpg
5. Place image in the “drop folder”
(remember to save a copy for yourself to you folder)
ASSIGNMENT #03
(Due 2/14/11) Selective Focus
PART 1
READING:
National Geographic Ultimate Field Guide, pages 44-82
1. Focus; 76-82
PART 2
Photographer’s Bio’s:
1. History of Photography Timeline
2. History of Photojournalism; Roger Fenton
PART 3
SELECTIVE FOCUS is a technique in which one portion of a photograph is in focus, while other elements are blurred out-of-focus. The photographer makes the choice. Remember, the viewer's eye is naturally drawn toward the part of the photo that is in sharp focus. This is achieved by careful focus and employing shallow depth of field through the use of a wide aperture. The subject is isolated from its surroundings, through focus and depth-of-field.
SHOOTING ASSIGNMENT:
Photo 1
Photograph a person holding or with their favorite object, with obvious foreground vs. background. Compose a photograph focusing on the object. Only the object should be in sharp focus. The person should not be in sharp focus. Using depth-of-field and selective focus, try to isolate the subject from its surroundings to create a clean, sharp image. Be mindful of the technical issues we’ve discussed in class; such as DOF, movement. Review examples shown in class.
Photo 2
Photograph a close-up of a person in a favorite room or place, with obvious foreground vs. background. There should be a connection between the person and place.
Compose a photograph focusing on the person. Only the person should be in sharp focus. The room or place should not be in sharp focus. Using depth-of-field and selective focus, try to isolate the subject from its surroundings to create a clean, sharp image. Be mindful of the technical issues we’ve discussed in class; such as DOF, movement. Review examples shown in class.
This is a creative and technical assignment. Make strong expressive photos!
Shoot different angles, work the subject.
*Students must complete:
1. Select (1) best photo one of each.
2. use Photoshop to edit images.
3. Be sure to include a caption, -2pts
4.SLUG PHOTO AS FOLLOWS:
EXAMPLES:
yourlastname_ focus_object.JPG,
yourlastname _ focus_person.JPG
***photos must be slugged correctly, -1pt
5. Place images in the “drop folder”
(remember to save a copy for yourself to you folder)
 Self-portrait by Dan O'Leary

(Due 02/07/11)
PART 1
READING:
National Geographic Ultimate Field Guide
“Digital Cameras” pages 44-49
“Lenses” pages 50-59
“Exposure” pages 60-76
“Motion” pages 118-124
PART 2
http://ramapophotoj.blogspot.com/2008/09/nppa-code-of-ethics.html
PART 3
SHOOTING ASSIGNMENT #02; Depth-of-field & Motion
Demonstration of picture taking basics.
This is both a technical exercise, and a creative assignment.
These should be your best photos, in terms of technical control and strong composition. Select appropriate subjects for each part.
COMPLETE EACH PART IN OBVIOUS FASHION, meaning if it calls for blurred motion, make sure above all else –it shows motion!
Follow instructions carefully. Failure to follow instructions will reflect in your grade.
Take (4) different types of pictures of someone, ask someone to pose for you. REMEMBER, you are in charge of the shoots.
Using a standard camera and lens.
DO NOT USE A FLASH FOR THIS ASSIGNMENT.
1. Shallow Depth of Field
Shoot photos with obvious shallow depth of field.
Using standard camera and lens, take photos of your main subject from about 6 feet away, with distinct object(s) or person in background. Main subject should be in focus in the foreground, and an object or person in background should be out-of-focus.
-HINT: shoot photo indoors or outside in shady area. Avoid direct sunlight.
-Background should be out-of-focus, only main subject should be in focus.
-If meter reading suggests shutter speed less than 1/60th sec. (ex. 1/30th, 1/15th,) go somewhere else where there is more light.
-Main subject should be sharp and in focus, and photo should not be shaky or blurry.
2. Sharp Depth of Field
Shoot photos with obvious sharp depth of field.
Using standard camera and lens, take photos of your main subject from about 6 feet away, with distinct object(s) or person in background. Main subject should be in focus in the foreground, and an object or person in background should be in focus too.
-HINT: Shoot in bright area, direct sunlight is good.
-F/stop should reading should be between f/8 and F/32.
-Main subject and background should be sharp and in focus, and photo should not be shaky or blurry.
3. Stop Motion
Shoot action photos with subject in obvious stopped motion, use techniques discussed in class. Shoot pictures of your main subject moving quickly (ex. running, jumping, biking, skating) left to right, right to left, or up and down, using a standard camera and lens. Use fastest shutter speed settings, at least 1/500th sec. This should freeze the action. Subject should not be showing movement. Main subject should be sharp and in focus, and photo should not be shaky or blurry.
-Subject should be about 5-10 feet away, and be central part of the photo.
GET CLOSE TO THE SUBJECT.
-Subject should be in center of frame
-Do not shoot cars, subject must be people
-HINT: Shoot in bright sunlight
-Main should be sharp and in focus, and photo should not be shaky or blurry.
4. Show Motion
Shoot action photos with subject in obvious motion, use techniques discussed in class.
Shoot pictures of your main subject moving quickly left to right, right to left, or up and down, using a standard camera and lens. (ex. running, jumping, biking, skating)
Use a slow shutter speed setting (ex. 1/60th, 1/30th) but not too slow as to cause camera shake. This should blur the action but NOT the photo.
-Subject should be about 5-10 feet away, and be central part of the photo.
GET CLOSE TO THE SUBJECT.
-Subject can be in center of frame
-Do not shoot cars, subject must be people
-HINT: Do not use so slow a shutter speed that image is unrecognizable.
Main subject should be blurry from movement, NOT from camera shake.
Know the difference.
*Students must complete:
1. Select (1) best photo of each. (4) total.
2. Follow “Basic Photoshop”, use outline provided if needed.
3. Write complete caption, include assignment name in caption.
4.SLUG PHOTO AS FOLLOWS:
EXAMPLES:
franklin_dofsharp.jpg
franklin_dofshallow.jpg
franklin_stopmotion.jpg,
franklin_showmotion.jpg
7. Place images in the “drop folder” DO NOT SUBMIT FOLDERS.
(remember to save a copy for yourself to you folder)
 Mourning slain soldier